Clear aligners are popular teeth straightening options responsible for treating a misaligned smile. Recently, this orthodontic treatment has taken over traditional metal braces treatment, which is painful and uncomfortable. Considering your dental treatment, comfort should always be the priority. If you want to opt for clear aligner treatment and are thinking of how to use it, this blog is for you. We will explore all the information you need to know before beginning your clear aligners treatment.
What are Clear Aligners?

Clear aligners are dental trays that are customized according to the size of your mouth. This dental device is made of plastic, which makes it nearly invisible. Unlike traditional metal braces, they are easily removable at home and are more comfortable. Furthermore, clear aligner treatment does not demand frequent dental visits for adjustments.
How Do Clear Aligners Work?
Clear aligners work by placing gentle pressure on the teeth to shift them to the desired position. Each set of aligners should be worn for 20 to 22 hours a day for 10 days before shifting to the next set.
A Guide For Inserting Your Clear Aligners
Wearing clear aligners is not tricky, but you need to follow the below-mentioned steps for safe usage:
1. Wash Your Hands
The first thing you need to do is keep in mind the hygiene of your dental treatment. Before you begin the process of putting your aligners in your mouth, wash your hands properly with soap. This ensures no germ stays on your hands and avoids getting in contact with your mouth. By reducing the risk of bacterial contact with your mouth, you can experience enhanced dental hygiene.
2. Clean the Aligners
Take your aligners and rinse them under lukewarm water to clean them, ensuring no dust or debris remains on their surface. You can also opt for different ways of cleaning your aligners, such as using non-abrasive toothpaste or soaking in cleaning solutions. Remember! Do not use hot water for cleaning, as it can damage your aligners.
3. Fit Your Clear Aligners

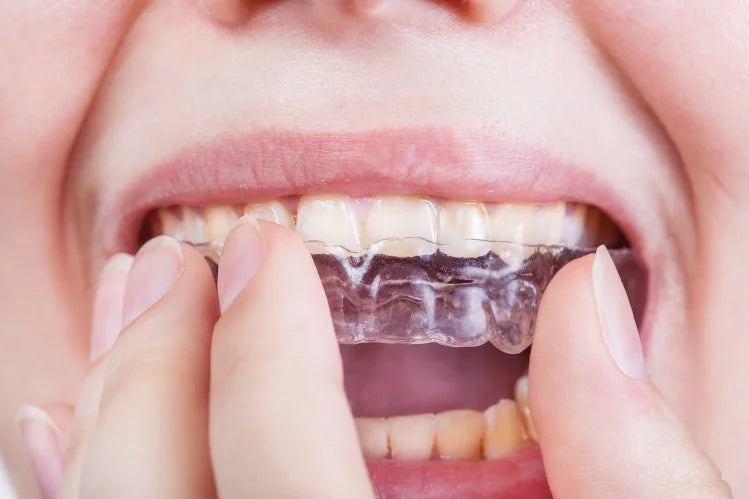
Once your aligners are clean, identify the upper and lower arch. Now take the aligner you want to insert first. Place it in the mouth and fit it in the front section first. Once it perfectly snuggles your front teeth, move to the molars. Apply gentle pressure to fix them. Then, repeat the same procedure for inserting the other arch.
4. Use Aligner Chewies For a Perfect Fit
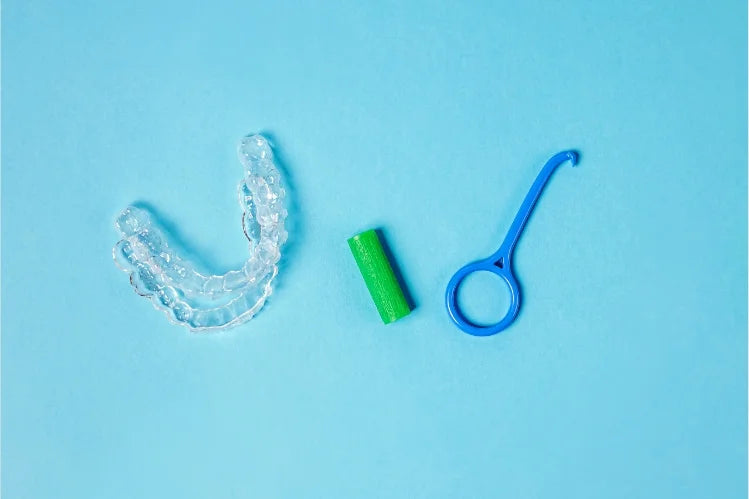
To ensure a perfect fit, use aligner chewies. These are reusable cylindrical silicon chewies that are used to adjust your clear aligners by biting on them.
A Guide For Removing Your Clear Aligners
Now that you know how to insert your aligners, the following is the guide to take them off your smile in an easy way:
1. Clean Your Hands
Your dental products are always touched with clean hands; therefore, make sure to begin the removal procedure with clean hands. Rinse your hands with soap and water to make sure they are germ-free.
2. Use a Pull Tool
Using your fingers for the removal can never be a safe option. If you try to remove your aligners using your fingers, there is a higher chance you can damage them. Furthermore, it also causes poor dental hygiene by transferring germs to your mouth.
For an easy and quick removal of your clear aligners, use a pull tool. It has a hook that is inserted in the aligner and a ring for a strong grip. A pull tool is specifically designed for the removal process, keeping in view your dental hygiene. Make sure you rinse your pull tool before moving forward with the removal process.
3. Lift the Aligner From Back
Once your pull tool is ready to be used, insert the hook in the aligner from the molars and pull it down. Repeat the process on the other side of the molar as well.
4. Repeat the Process at the Front
After the back part of your aligner is loosened, repeat the process at the front. Insert the pull tool at the front and push it gently; it will be completely removed.
5. Clean the Aligner
When your clear aligner is removed, rinse it under water to clean it and remove any debris present on it.
6. Store in a Case
Avoid placing your aligner anywhere on the surface to prevent damage or loss. Get a plastic case for its storage to keep it safe.
Tips For Maintaining Your Clear Aligners
Clear aligners are a dental product that should be maintained carefully. The following are some tips for you to maintain your clear aligners:
1. Be Gentle To Your Dental Product
As clear aligners are made of plastic, they can be damaged easily. To avoid this, be gentle with your clear aligners. Do not apply excessive pressure or force them while wearing or removing them.
2. Store Well

Keeping them properly stored in a case plays a crucial role in its maintenance. Always keep it inside a case you are given with your aligners.
3. Remove Your Aligners Before Eating
One of the most important features of clear aligners is their removability. It is important to remove them before eating to avoid any damage. As they are made of plastic, a slight pressure while biting or chewing can damage them or hurt your gums.
4. Maintain Your Hygiene
With clear aligner treatment, ensure proper dental hygiene. Clear aligners are removable, which makes it easier for you to brush your teeth properly. Poor dental hygiene leads to plaque accumulation, which can lead to further dental complications. For a safe dental treatment, make sure to clean your teeth properly to avoid any food particles getting stuck.
Begin Your Customized Teeth Straightening with Smilepath
If you want to go for clear aligner treatment, SmilePath is here to help you out. You can begin your customized treatment plan by the following steps:
- Order an impression kit to create your dental impressions at home.
- Considering your dental impressions, a 3D dental plan will be created for you.
- Receive your customized clear aligners at your doorstep. Wear them for the recommended time and transform your smile.
Clear aligners are invisible, which makes them barely visible, but if you want to align your smile without anyone knowing, you can opt for NightOnly clear aligners as well. You can head towards your dream smile while sleeping with Smilepath.
To sum it up, clear aligners can be a perfect way to transform your smile only if used correctly. Inserting or removing your aligners is a simple procedure, but make sure you follow a proper guide. Furthermore, keep in view your dental hygiene while performing the procedure to carry out a smooth dental procedure.
FAQs
Clear aligners are customized teeth straightening dental products that are placed inside the mouth to gently shift your teeth to the desired position.
All-day aligners are worn for 20 to 22 hours per day, whereas NightOnly aligners are worn for 8 to 10 hours at night.
No! You cannot eat with your clear aligners on, as they might get damaged due to the pressure exerted during chewing. Therefore, remove them, have your meal, and put them back on.
Opting for clear aligner treatment aligns your teeth in just 4 to 6 months. Therefore, they are a perfect alternative for metal braces treatments that can take more than a year to offer treatment.
No! Clear aligners are removable, which makes it easier for you to eat anything you want. Just make sure you remove them gently and enjoy your meal.


 Australia
 New Zealand
 Malaysia
 English
 Portuguese
 English
 English
 English
 English
 English
 Canada